Simulating SMLM data
Note
Time required: ~10 min.
In this tutorial, you will learn how to simulate SMLM data based on a geometric model.
Task
Simulating realistic localization data based on a geometric model.
Main tutorial
Preparation
You have to load the geometric model for generating localizations. We use LocMoFitGUI as the interface for setting up the model. Here we use the point model dualRing3D_discrete of the nuclear pore complex (NPC) as an example:
Start SMAP (how to?).
Load a new instance of the module LocMoFitGUI in tab [ROIs] -> [Evaluate] (see quick start to recap).
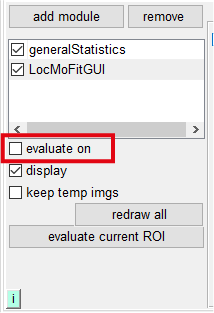
Uncheck evaluate on in the left panel:
Load the particular model and set up the settings for the model parameters:
Go to [M1] -> [Model], click the drop-down menu (where select the model… is shown), and then select
dualRing3D_discrete.
Simulation
Once the model is loaded, we have to pass it on to the simulation engine provided by SMAP:
We first connect the engine to the model:
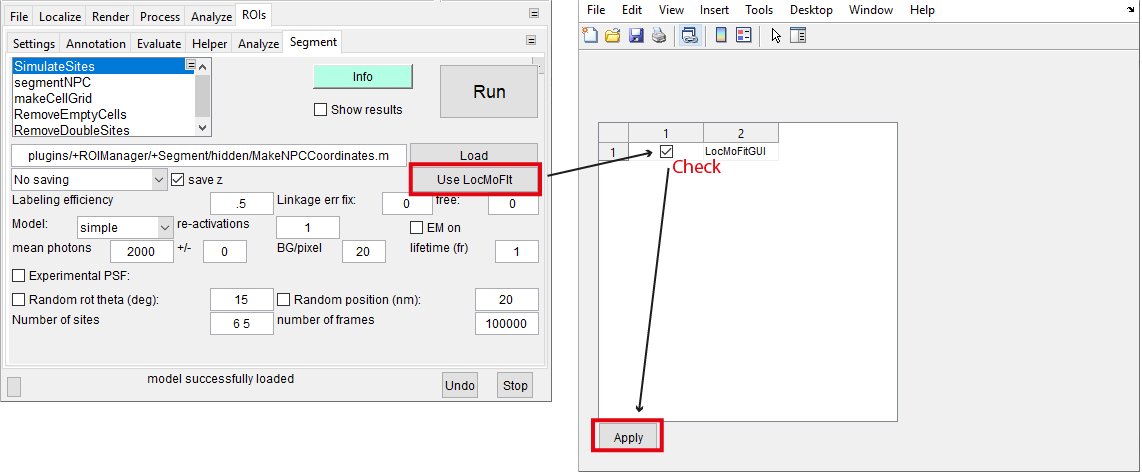
Go to [ROIs]->[Segment], click SimulateSites in the list of plugins:
Click Use LocMoFit and check LocMoFitGUI in the new window.
Click Apply.
LocMoFitGUI is successfully loaded if the new button Set model pars shows up.
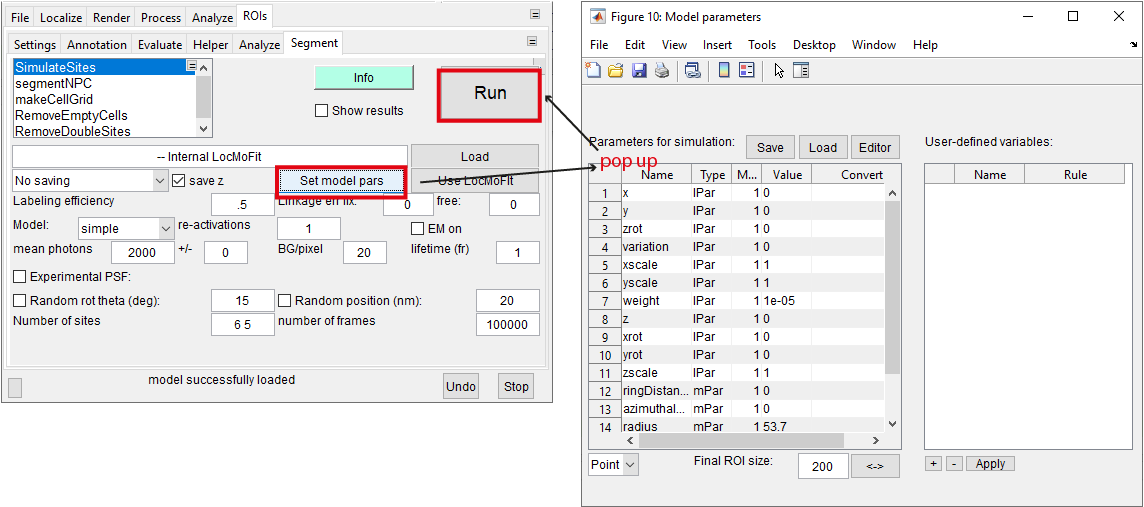
Click Set model pars. A new window will show up and allow you to specify parameter values. Here we keep the default values so do not have to change anything:
Note
How do I specify parameter values?
For specifying a fixed value, enter it in field Value for a parameter (can be identified in the columns Name, Type, and Model).
For a random value sampled in a defined interval, enter two values (e.g., ‘-15 15’) separated by a space in field Value. In this example, the parameter will be a random value between -15 and 15.
Usually, we have to set up the SMLM properties in tab [SimulateSites]. For simplicity, we keep the default values.
Hint
You can hover over the respective properties in the tab to show their definitions.
Click Run in [SimulateSites]. The simulation is done when ‘ROIManager.Segment.SimulateSites finished’ is displayed in the status bar. This usually takes a few seconds:
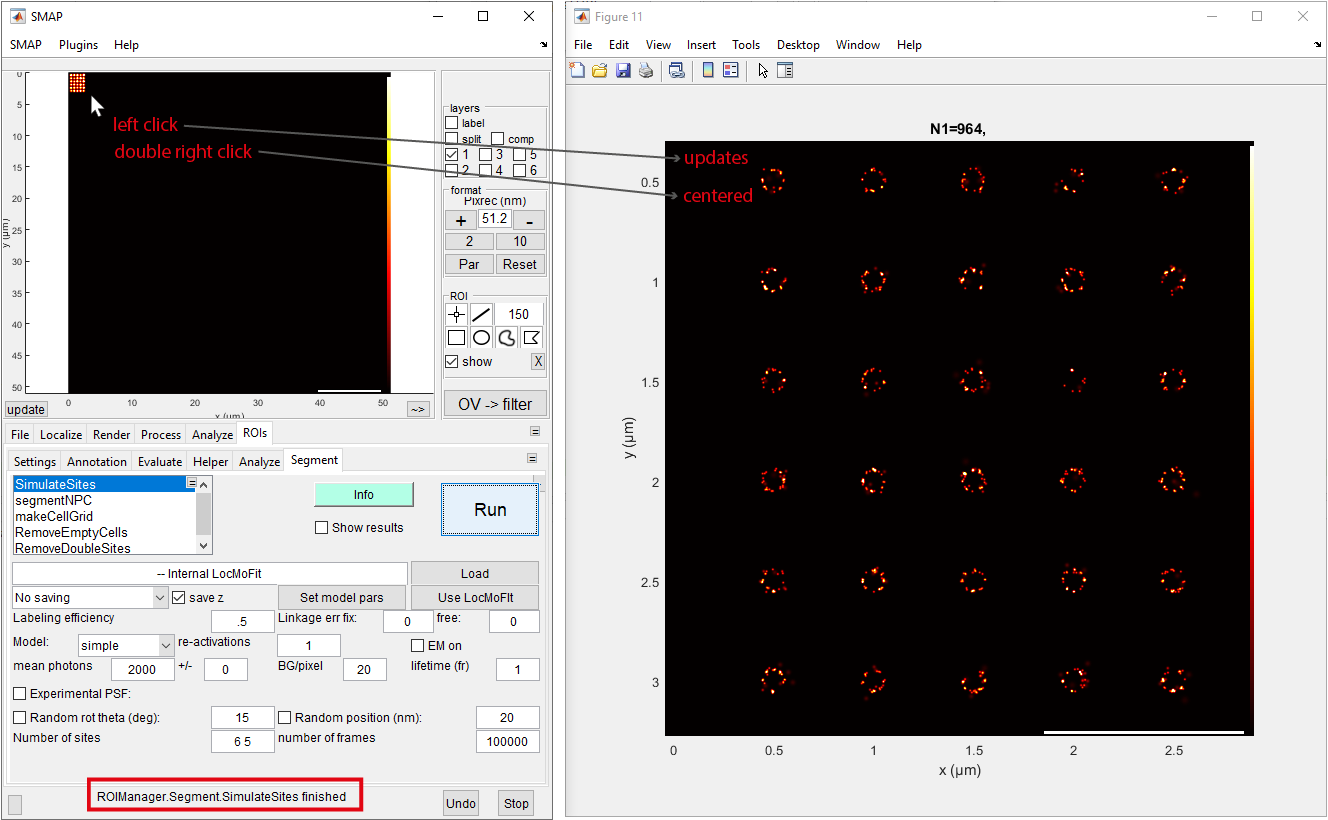
Now you can explore the overview of the simulated data. You can interact with the overview with a left click or right click. You can deal with the simulated data as with real data.
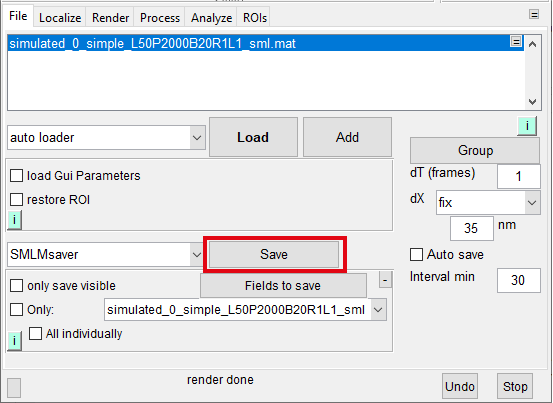
Note
How do I keep the simulated data? You can save it through button Save in tab [File]:
This is the end of the tutorial.