Chaining steps
Note
Time required: ~20 min.
Note
In this tutorial, we loaded the pre-defined parameter settings to simplify the procedure. For all the structures we fit in our manuscript, we provide optimized settings. However, when you work on a new structure, you have to tweak the settings yourself and modify the parameter table (find out more here).
Task
Chaining fitting steps with the GUI. We will set up two fitting steps with different models, using the results of the previous step as the initial parameters for the next one.
Requirement
Software: SMAP installed. Further information can be found on our GitHub site.
Localization data: U2OS_Nup96_BG-AF647_demo_sml.mat
Fitting settings:
NPC3D_step1_dualRings_LocMoFit.mat (the one you saved in the last tutorial)
NPC3D_step2_dualRings_freeRadius_LocMoFit.mat
NPC3D_step3_points_LocMoFit.mat
Files can be downloaded here.
Important
Please first finish the tutorial composite model.
Main tutorial
Preparation
Loading LocMoFit
Now you need three instances of LocMoFit:
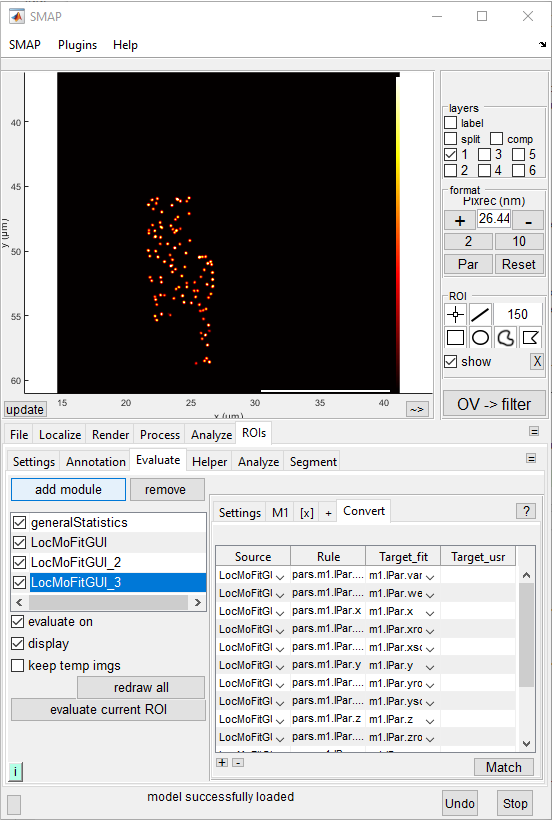
Go to [Evaluate] tab and click on add module.
In the popup window, select LocMoFitGUI and click ok.
Repeat the two steps above twice more.
Now you should see the LocMoFitGUI, LocMoFitGUI_2, and LocMoFitGUI_3 in the loaded modules. These are for three different fitting steps respectively.
Setup
Next, we load the LocMoFit settings for fitting three different models (step 1: ring3D; step 2: dualRing3D_discrete; step 3: also dualRing3D_discrete but with only 32 points).
Step 1 fits the composite dual-ring model (template) you built earlier to detect the ring separation, position, and orientation of the NPC.
Step 2 fits a single dual-ring model with a free radius to detect it and to fine-tune other parameters.
Step 3 fits a point model to detect the ring twist. To set them up, follow the steps below:
For step 1, click LocMoFitGUI in the list of loaded modules.
On the right panel, go to [Settings], click load, navigate to the settings directory, and select NPC3D_step1_dualRings_LocMoFit.mat (which you saved earlier).
For step 2, click LocMoFitGUI_2 in the list of loaded modules.
On the right panel, go to [Settings], click load, navigate to the settings directory, and select NPC3D_step2_dualRings_freeRadius_LocMoFit.mat.
For step 3, click LocMoFitGUI_3 in the list of loaded modules.
On the right panel, go to [Settings], click load, navigate to the settings directory, and select NPC3D_step3_points_LocMoFit.mat.
Go to tab [Convert], click Match. You should see a new window:

Note
What is this popup window for? It allows you to pass the parameter estimations from the previous steps to the current step as initial parameters based on the names of parameters.
In the popup window, in Source LocMoFitGUI, change the selection from this model to LocMoFitGUI_2 and the click Apply. Now you should see new information filled in tab [Convert]:
Note
[Convert] can be used to convert the fitted values in the previous step to an initial parameter of the current step. It calculates values according to the rules based on its source and then writes the values to the target_fit (see the column names of the convert table). For example, you just defined to assign the parameter m1.mPar.ringDistance in this step from the Source LocMoFitGUI based on the value calculated by the Rule pars.m2.lPar.z.
m1.mPar.ringDistance and pars.m2.lPar.z are IDs of the corresponding parameters. m1.mPar.ringDistance means the parameter ringDistance, which is an intrinsic parameter (mPar) of model 1 (m1). See the syntax that can be used in [convert].
Fitting
Click on site 1 in the ROI manager window. Now you should see three viewers, one for each step:
X-Y view
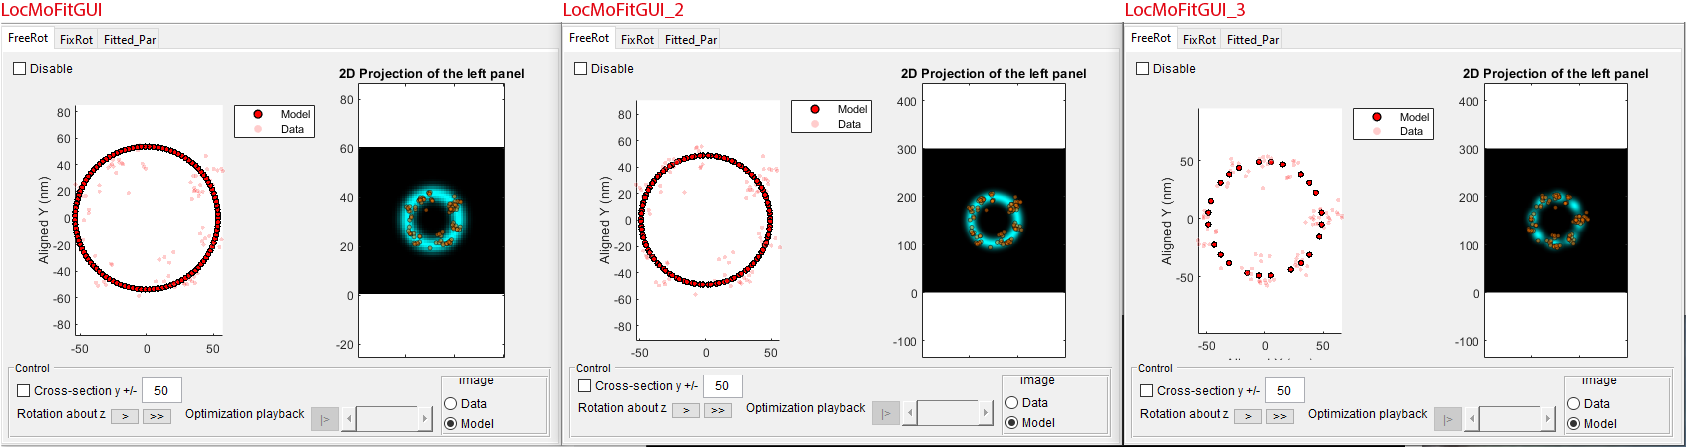
X-Z view
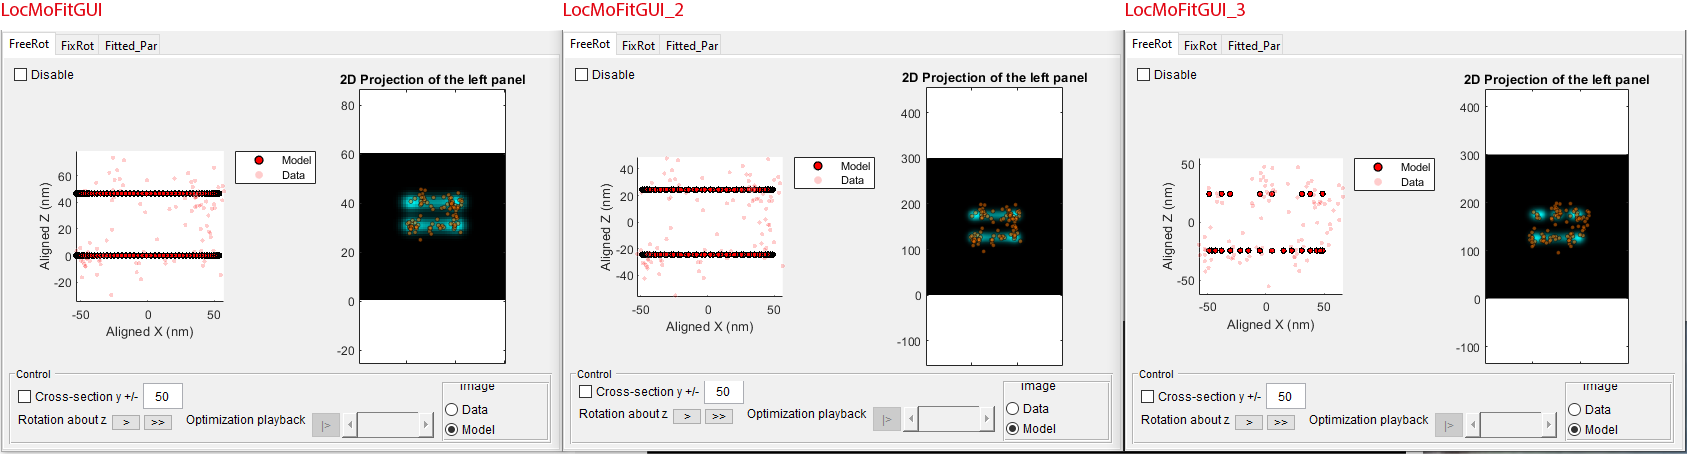
You can further explore a few sites to get familiar with the interface.
Batch fitting
After inspecting several sites, we are now moving on to fit all sites. Such a batch analysis can be executed with the redraw all function to perform the fitting site-by-site:
To disable the viewers for efficiency, stay in the [Evaluate] tab. In the left panel, uncheck display:
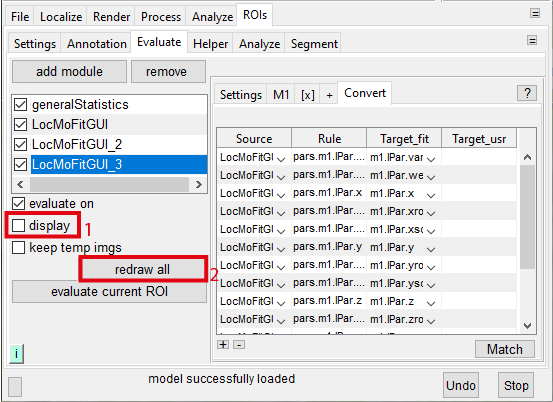
Click redraw all as shown above. You will see the analysis going down the ROI list.
Note
While running, you should see the message “redrawall: site [current site] of 100” in the status bar.
You will know the analysis is done when “redrawall: completed” shows up in the status bar. This usually takes around 7 minutes.
Summary of parameter values
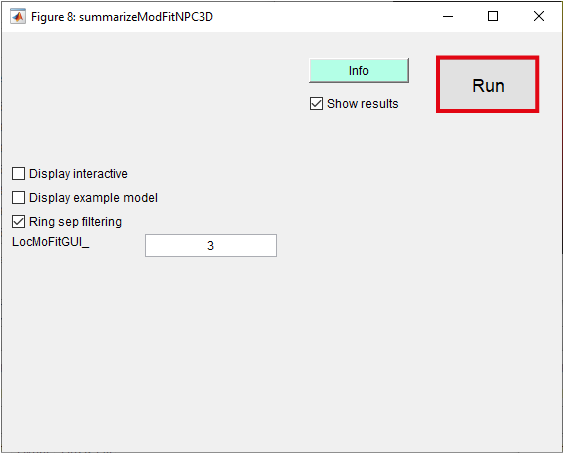
When the redraw all is done, all the fit results have been saved in the SMAP session. To show the summary of parameter values, you can use the SMAP plugin summarizeModFitNPC3D:
Go to the drop-down menu [Plugins] -> [ROIManager] -> [Analyze] -> [summarizeModFitNPC3D]:

Click Run in the new window:
The window where a scatter plot and histograms are will then pop up:
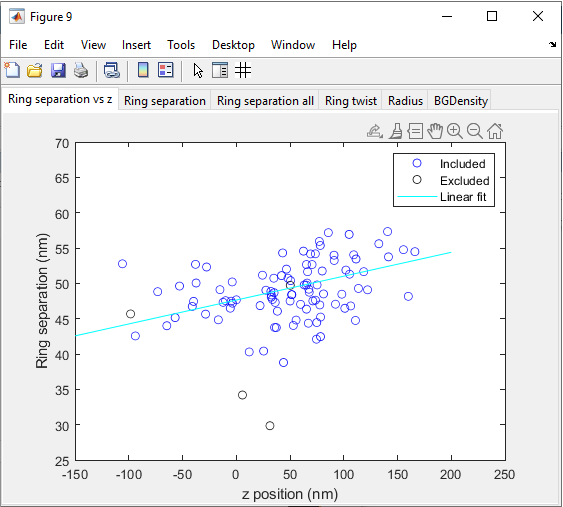
The tabs are:
Ring separation vs z: a scatter plot showing the correlation between the z position and ring separation of the NPCs.
Ring separation: a histogram of the ring separation (one-ring sites excluded).
Ring separation all: a histogram of the ring separation (all sites).
Ring twist: a histogram of the ring twist (one-ring sites excluded).
Radius: a histogram of the radius (one-ring sites excluded).
BGDensity: a histogram of the background density (one-ring sites excluded).
Now you have reproduced the workflow we applied in the manuscript to extract key structural parameters of single NPCs!
The end of the introductory series
This tutorial is the end of the introductory series. If you started from quick start and followed along the Next tutorial section in each tutorial, you should have learned the basics of LocMoFit.